
Capturing a construction site is about telling the story of progress, showcasing your craftsmanship, and making an impression on clients and investors.
If you’re a construction manager looking to document your project, a marketing pro gathering visuals for social media, or a business leader exploring how to present your projects better, this guide is for you.
We’ll walk you through the basics of how to do construction photography, share professional tips for shooting from the ground and the air, and help you understand how partnering with a company like Aerial Innovations Southeast can take your visuals to the next level.
Why Construction Photography Matters: More Than Just Pretty Pictures
Construction photography isn’t just for marketing (though it’s great for that, too). High-quality job site photography has many other benefits, including:
- Tracking progress over time
- Documenting safety and compliance
- Helping win future bids
- Impressing stakeholders
- Boosting your brand presence
- Increasing construction site safety via drone footage
Well-shot construction site photography can be reused for social media, presentations, and investor conferences, and it shows the hard work behind the scenes. Who doesn’t love progress photos?
How to Do Construction Photography: Start with the Right Plan
Use these tips to improve your construction photography:
1. Know Your Objective
Before snapping a single shot, think about what you’re trying to capture. Are you showing a completed phase, documenting a milestone, or highlighting a crew in action?
Each goal may call for a different style of photography. Progress documentation, for instance, might need regular, scheduled shots from the same angles. Marketing photos, on the other hand, should be dynamic and eye-catching.
2. Time Your Shoots Strategically
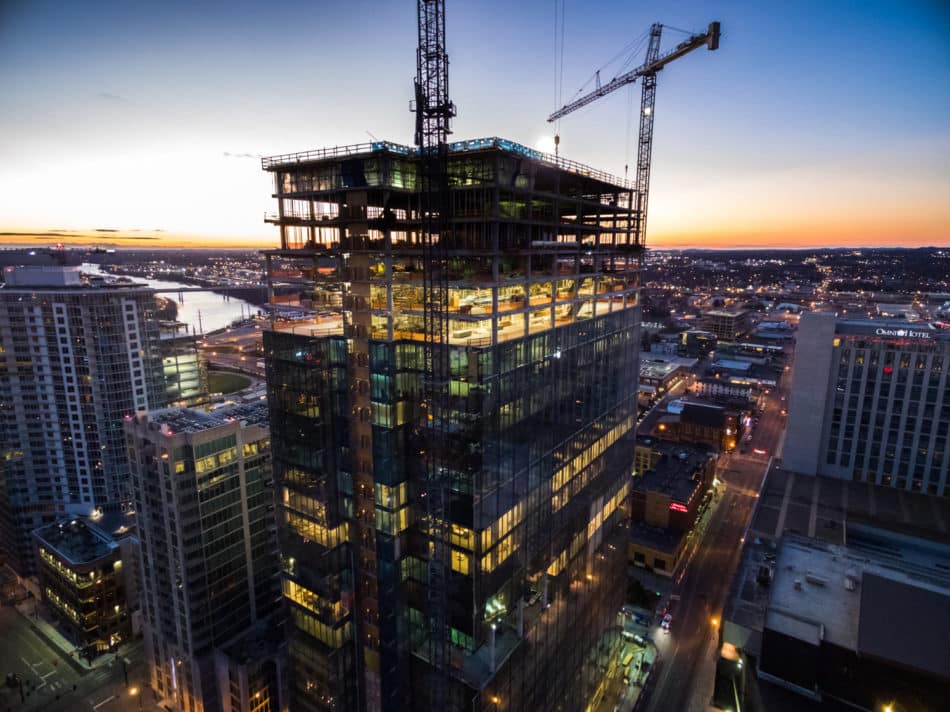
Lighting makes a huge difference. The golden hours (early morning or late afternoon) offer soft, warm light that enhances details and cuts down on harsh shadows. Overcast days are also great for reducing glare and keeping colors balanced.
Avoid shooting at high noon unless it’s necessary. The sun will cast hard shadows and can wash out important details.
3. Use the Right Equipment
You don’t need a Hollywood setup, but quality gear helps. If you’re doing it yourself:
- Use a DSLR or mirrorless camera if possible
- Bring a sturdy tripod for consistent shots
- Wide-angle lenses are great for capturing scale
- A drone is perfect for aerial shots and big-picture views, as long as an FAA-certified pilot is flying it (more on that below)
Of course, hiring professionals (like us) means you don’t have to worry about gear at all. We bring the whole toolkit.
Construction Photography Tips from the Pros
Here are our hard-won tips based on our own experience:
4. Keep It Clean and Safe
Before photographing, tidy up the scene. Remove trash, secure loose wires, and make sure workers are wearing proper safety gear. A clean, organized site reflects professionalism and care.
Just as important: safety comes first. Always wear your PPE and stay aware of your surroundings, especially when using drones or climbing for higher angles.
5. Capture Before, During, and After
Telling a story is easier when you have a timeline. Taking photos before construction begins, during major milestones, and after completion creates a full narrative. You’ll end up with a valuable visual archive and a powerful promotional tool.
6. Focus on the Details
Big wide shots are impressive, but don’t forget the small stuff. A close-up of a weld, a beam being lifted into place, or the texture of raw materials can add variety and artistry to your photo collection.
Details also show craftsmanship and give a sense of the work involved.
7. Highlight the People
A construction site isn’t just machinery and materials; it’s people. Show the crews in action, collaborating, and using their skills. These human moments add warmth and authenticity to your visuals, and they make your brand feel more relatable.
Aerial Construction Photography: Tips for Drone Shoots
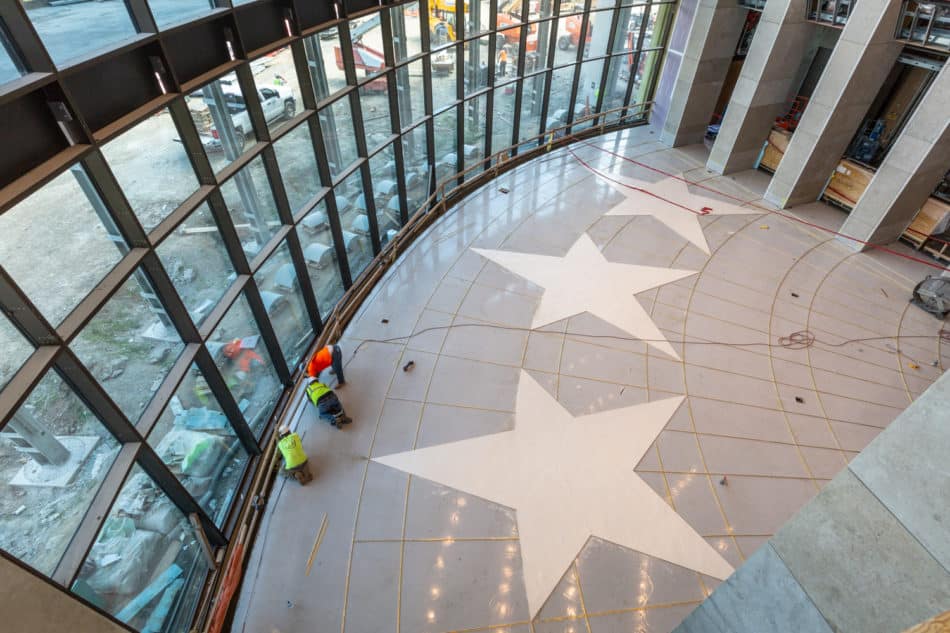
Ground photos show the craftsmanship up close. Aerial photos show the whole site at once, including how the build sits within the neighborhood around it.
Drone work is our bread and butter, so here’s what we’ve learned from flying construction sites across the Southeast.
8. Mix Oblique and Overhead Angles
Most aerial construction photography falls into two camps:
- Oblique shots: The camera is tilted, usually somewhere around 45 degrees. These look the most natural and work well for marketing, proposals, and social media.
- Overhead shots: The camera points straight down. These are great for showing site layout, laydown areas, and how far each phase has moved.
We shoot both on almost every flight. It adds very little time in the air, and it gives the marketing team and the project team the images they each need.
9. Pick Your Altitude on Purpose
Higher isn’t always better. A shot from 350 feet can show the full footprint of a large commercial site. A shot from 100 to 150 feet usually does a better job of showing equipment, materials, and crews at work.
FAA rules cap most commercial drone flights at 400 feet above ground level, so every shot has to fit under that ceiling.
10. Fly the Same Path Every Time
If you’re documenting progress from the air, repeat the same positions, heights, and camera angles on every flight. Month-over-month images will line up, and anyone can see what changed at a glance.
That’s why we fly many of our construction clients on a set monthly schedule and return to the same shot positions each visit.
11. Know the Drone Rules Before You Fly
Anyone flying a drone for business in the U.S. has to follow the FAA’s Part 107 rules. Here are the big ones for construction sites:
- Certification: The pilot needs an FAA Remote Pilot Certificate, which means passing the FAA’s knowledge test.
- Altitude: Stay at or below 400 feet above ground level in most cases.
- Line of sight: The pilot or a visual observer has to keep eyes on the drone for the whole flight.
- Remote ID: Registered drones need to broadcast Remote ID information while they fly.
- Flying over workers: The FAA’s Operations Over People rule limits when a drone can fly over people. For many drones, flying over a crew is only allowed on a closed or restricted-access site where everyone has been told a drone will be overhead.
- Airspace: Sites near airports may need FAA authorization before the drone goes up.
If you hire a drone company, ask to see their Remote Pilot Certificate and proof of insurance before the shoot. It’s a quick check that protects your site.
12. Loop In the Superintendent
Before we fly, we check in with the site superintendent about crane activity, deliveries, and any areas the crew wants us to stay clear of. A five-minute call keeps the drone out of the way and gets us to the right spot at the right time.
Want a team that handles all of this for you? See how our aerial construction photography services work.
How to Take Construction Progress Photos That Line Up
Progress photos are only useful if you can compare them. A random set of phone photos from different spots won’t tell anyone much, but a consistent set from the same spots tells the whole story of the build.
13. Set Fixed Photo Points
Pick a few spots around the site and shoot from them every visit. Mark them on a site plan or tie them to a landmark, like a light pole or fence corner, so anyone on the team can find them later.
Try to match the time of day and camera settings, too. Changes are much easier to spot when the light looks the same from photo to photo.
14. Shoot on a Regular Schedule
Weekly, biweekly, and monthly schedules all work. What matters most is sticking with the one you pick.
Plan extra shoots at major milestones as well, like when the steel tops out or right before drywall covers what’s inside the walls.
15. Use a Shot List for Each Phase
Here’s a simple construction photography shot list you can adapt for your next project:
| Phase | What to Capture | Best Angle |
|---|---|---|
| Pre-construction | Existing site conditions, access roads, neighboring properties | Aerial overhead and wide ground shots |
| Site work and foundation | Grading, underground utilities, footings, slab pours | Aerial overhead |
| Structure | Steel or framing, crane lifts, each new floor | Aerial oblique and ground |
| MEP rough-in | Plumbing, electrical, and HVAC before the walls close | Close-up ground shots |
| Exterior and finishes | Facade, roofing, windows, landscaping | Ground and aerial oblique |
| Completion | Finished exterior, interiors, golden hour and twilight shots | Ground, aerial, and interior |
16. Name and Organize Files as You Go
A great photo doesn’t help anyone if nobody can find it. Use a consistent file name with the project, date, and photo point (for example, MainSt-2026-09-15-NE-Corner.jpg). Then keep all of your photos in one shared folder the whole team can reach.
For more on turning photos into updates your team and owners will read, check out our guide to construction photography for progress reporting.
Tips for Social Media Managers in Construction
Showcase your work on social media using these strategies:
17. Plan Content in Advance
When your team schedules regular shoots, you’ll always have fresh content. Use a mix of wide shots, detail images, and behind-the-scenes moments. A well-planned gallery gives you weeks (even months) of social media content.
Bonus tip: vertical shots are perfect for Instagram stories and reels, while horizontal work better on websites and LinkedIn.
18. Use Captions That Tell a Story
Photos are great, but captions bring them to life. Highlight the team’s efforts, explain what’s happening in the image, and tag partners or vendors when possible. This builds community and boosts visibility.
19. Optimize for Each Platform
Not all content fits everywhere. What works for Facebook might not perform well on LinkedIn. Vary your tone and choose visuals that align with the platform’s audience. For example:
- LinkedIn: emphasize project milestones or teamwork
- Instagram: go for visually striking shots and behind-the-scenes content
- Facebook: mix community involvement and progress updates
Why Hire a Professional Construction Photography Team?
At Aerial Innovations Southeast, we specialize in documenting construction projects across the Southeast. Our team knows how to work on active job sites safely and efficiently. We offer ground and aerial photography, progress documentation, time-lapses, and more.
Hiring a pro means:
- You get consistent, high-quality images
- You save time and avoid distraction
- Your marketing looks polished and credible
- You get the right photography for the type of construction photos you need
Plus, we understand the flow of construction. We won’t get in the way, and we know how to capture the good stuff without slowing you down.
Real-World Applications
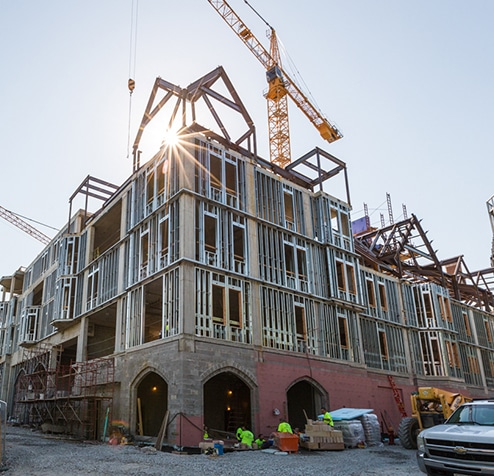
Here’s how construction photography helps in the real world:
- Executives use visuals to pitch future projects and impress stakeholders
- Managers rely on it for updates, tracking, and safety records
- Marketers turn it into attention-grabbing content that builds the brand
In short, it’s a tool for communication, branding, and storytelling. A tool every construction company needs in a visual world.
Construction Photography FAQs
How Often Should You Take Construction Progress Photos?
Most projects do well with weekly or monthly photos, plus extra shoots at big milestones. Fast-moving projects, or sites with investors watching closely, may need them more often.
Do You Need a License to Fly a Drone Over a Construction Site?
Yes, if the flight is for business. In the U.S., the pilot needs an FAA Remote Pilot Certificate under Part 107, and the drone has to be registered with the FAA.
What’s the Best Time of Day for Construction Photography?
Early morning and late afternoon give you soft, warm light and longer shadows that show depth. Overcast days work well, too, since they cut glare. Try to avoid midday sun, which can wash out detail.
Should You Hire a Professional or Take Photos Yourself?
Phone photos from your team are great for daily records. For marketing images, aerial shots, and progress sets that need to line up month after month, a professional team saves you time and delivers more consistent results.
Our Final Construction Photography Tip
Construction site photography is a visual powerhouse that could earn you more investment, interest, and buyers when it’s done right. Whether you’re taking photos yourself or working with a team like ours, the key is to be intentional. Think about your goals, keep your site looking sharp, and always look for the human story behind the build.
Need more info? We’d love to hear from you. Reach out to us today! Let’s capture your next build from the ground up and the sky above.
Want to see examples of our work? Check out our gallery or contact our team for a custom quote.